
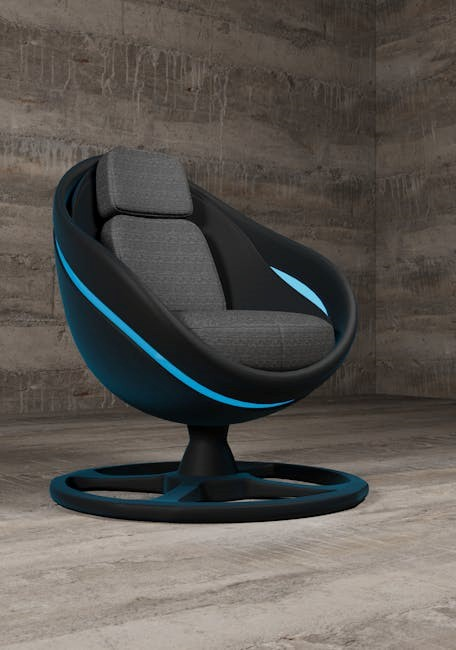
The Comhoma Recliner Chair offers comfort and style, perfect for relaxation. This guide provides step-by-step assembly instructions, ensuring a smooth and safe setup experience for all users.
1.1 Overview of the Assembly Process
The Comhoma Recliner Chair assembly process is designed to be straightforward and methodical, ensuring a hassle-free experience. It involves a series of steps, from unpacking to final tightening, with clear instructions and diagrams provided. The process is divided into key stages, including base and frame assembly, attaching the seat and backrest, and installing custom features like the reclining mechanism. Each step is carefully outlined to guide users through the process, emphasizing organization and preparation to avoid delays. By following the instructions, users can efficiently assemble their recliner, ensuring all components are securely fitted and functional. Proper assembly is crucial for safety and optimal performance, making the process worth the time and effort.
1.2 Importance of Proper Assembly

Proper assembly of the Comhoma Recliner Chair is essential for ensuring safety, durability, and optimal functionality. Incorrect assembly can lead to structural instability, potentially causing accidents or damage to the chair. By following the instructions carefully, users can avoid common pitfalls and ensure all components are securely fitted. Proper assembly also guarantees that the recliner operates smoothly, with features like the reclining mechanism and footrest functioning as intended. Additionally, correct assembly prolongs the chair’s lifespan and maintains its aesthetic appeal. It also ensures compliance with safety standards, providing peace of mind for users. Proper assembly is a critical step in enjoying the full benefits of the Comhoma Recliner Chair.
Preparation for Assembly
Gather all tools and materials, ensuring a clean, spacious workspace. Organize components and hardware for easy access, following the instructions step-by-step to avoid delays or confusion.
2.1 Tools and Materials Needed
To assemble the Comhoma Recliner Chair, you’ll need specific tools and materials. Essential tools include an Allen wrench, screwdrivers (both Phillips and flathead), pliers, and a rubber mallet for tapping parts into place. Ensure you have all hardware provided, such as screws, bolts, and washers. Additional materials like a soft cloth for cleaning and a measuring tape can be helpful. Organize these items in a container to avoid misplacement. Double-check the instruction manual for any specific tools recommended by the manufacturer. Having everything ready will streamline the assembly process and prevent delays. Make sure all tools are within easy reach to save time and effort during assembly.
2.2 Workspace Setup and Organization
Setting up a well-organized workspace is crucial for efficient assembly of the Comhoma Recliner Chair. Begin by clearing a large, flat area, such as a hardwood floor or a sturdy workbench, to accommodate all components. Cover the surface with a soft cloth or cardboard to protect the chair parts from scratches. Unpack all components and hardware, grouping similar items together. Use small containers or trays to organize screws, bolts, and washers to prevent misplacement. Keep tools within easy reach to minimize interruptions. Ensure good lighting to see small parts clearly. Finally, place the instruction manual nearby for quick reference. A tidy workspace will help you stay focused and avoid errors during assembly.
Safety Precautions
Ensure a safe assembly process by wearing protective gloves and safety glasses. Clear the workspace to prevent tripping hazards. Keep power tools out of children’s reach. Always follow the manufacturer’s guidelines to avoid accidents.
3.1 General Safety Guidelines
Always wear protective gloves and safety glasses to prevent injuries. Ensure the workspace is well-lit and clear of clutter to avoid tripping hazards. Keep children and pets away during assembly. Use tools only for their intended purposes and follow the manufacturer’s instructions. Avoid over-tightening bolts, as this may damage the chair’s frame. If unsure about any step, consult the manual or contact customer support. Never assemble the chair while fatigued or under the influence of alcohol. Take regular breaks to maintain focus and prevent accidents. Properly store all tools and hardware after use to ensure a safe environment.
3.2 Specific Safety Tips for Assembly
When assembling the Comhoma Recliner Chair, always handle heavy components with care to avoid strain or injury. Use a second person to assist with lifting or positioning large parts. Ensure all tools are kept out of reach of children and pets. Avoid wearing loose clothing that could get caught in tools or moving parts. Keep the assembly area clean and free from debris to prevent slipping or tripping. Never use power tools near water or in damp conditions. If a part feels stuck, do not force it; instead, check the alignment and consult the manual. Always tighten bolts gradually and avoid over-tightening, which may damage the chair’s frame. Take breaks if needed to maintain focus and avoid accidents.
Unpacking and Inventory
Begin by carefully unpacking all components and verifying each part against the inventory list to ensure nothing is missing or damaged, then organize them for easy access.
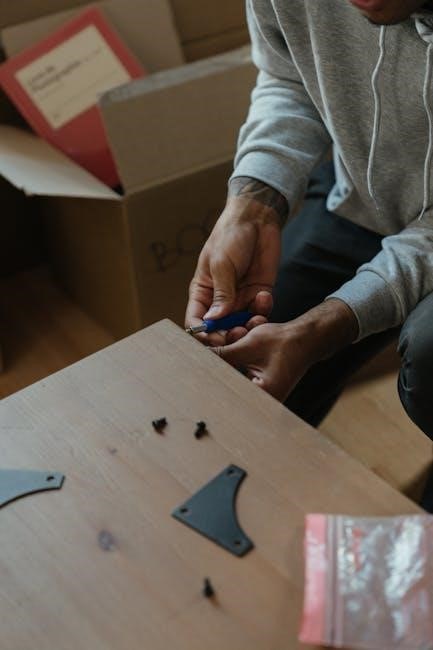
4.1 Identifying Components and Hardware
Start by identifying all components, including the base, frame, seat, backrest, armrests, and footrest. Locate hardware such as bolts, screws, and Allen wrenches. Refer to the instruction manual to match each part with its corresponding label. Organize smaller parts like washers and nuts in separate containers to avoid misplacement. Ensure all items are accounted for by cross-checking with the inventory list. Pay attention to labeled diagrams in the manual to understand how each piece fits together. Proper identification and organization of components will streamline the assembly process and reduce the risk of errors. Take your time to familiarize yourself with every part before proceeding.
4.2 Checking for Damages or Missing Parts
Before starting assembly, carefully inspect all components for any visible damage, such as scratches, dents, or bends. Cross-reference each item with the inventory list to ensure no parts are missing. Pay special attention to essential hardware like screws, bolts, and Allen wrenches, as missing items can delay assembly. If any components are damaged or missing, contact customer support immediately to resolve the issue. Additionally, verify that all packaging materials have been removed and that no small parts are overlooked. This step is crucial to ensure a smooth assembly process and prevent potential issues later. A thorough inspection now saves time and frustration in the long run.
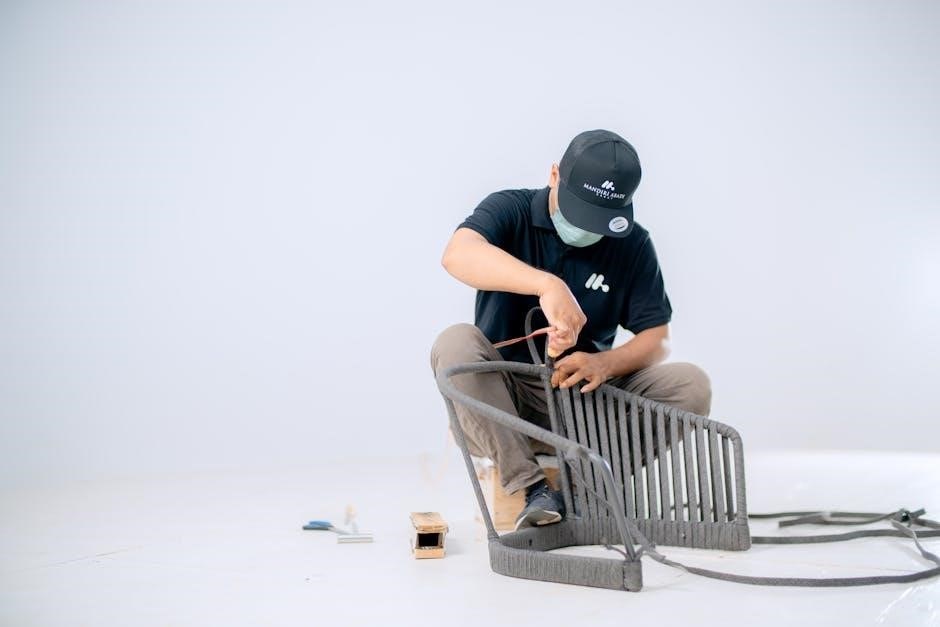
Step-by-Step Assembly Process
Follow detailed instructions to assemble the Comhoma Recliner Chair, ensuring each part is securely attached. Use provided tools and organize components to streamline the process effectively.
5.1 Assembling the Base and Frame
Begin by assembling the base and frame, which serve as the foundation of the recliner. Use the provided Allen wrench to attach the legs to the base plate, ensuring they are evenly spaced and securely tightened. Next, align the frame components with the pre-drilled holes and screw them into place using the bolts from the hardware kit. Make sure all connections are tight to maintain stability. Double-check the alignment to prevent any wobbling. Once the base and frame are fully assembled, proceed to attach the seat and backrest in the next step. A sturdy base ensures the chair’s durability and comfort.
5.2 Attaching the Seat and Backrest
After assembling the base and frame, carefully position the seat onto the frame, ensuring it aligns with the pre-drilled holes. Use the screws provided in the hardware kit to secure the seat firmly. Tighten the screws gradually, starting from the center and moving outward to avoid misalignment. Next, attach the backrest by aligning its mounting brackets with the corresponding slots on the seat. Use the bolts to fasten it in place, ensuring a snug fit. Double-check the alignment to ensure the backrest is level and evenly spaced. Once secured, test the stability by gently rocking the chair. Properly attaching the seat and backrest ensures optimal comfort and structural integrity.
Custom Features and Adjustments
Customize your Comhoma Recliner Chair by adjusting the reclining mechanism, headrest, and armrests for optimal comfort and support, ensuring a personalized relaxation experience.
6.1 Installing the Reclining Mechanism
Installing the reclining mechanism is a crucial step for optimal functionality. Begin by attaching the mechanism to the base of the chair, ensuring proper alignment with the frame. Secure it using the provided bolts, tightening firmly but avoiding overtightening. Next, connect the reclining cable to the armrest or designated control area, ensuring smooth operation. Test the mechanism by gently reclining the chair to confirm it moves effortlessly. If the mechanism feels stiff or uneven, adjust the cable tension or consult the manual for guidance. Proper installation ensures the chair’s reclining feature operates safely and efficiently, enhancing your overall comfort experience.
6.2 Adjusting the Headrest and Armrests
Adjusting the headrest and armrests ensures personalized comfort and support. Begin by loosening the adjustment knobs or levers located on the sides of the headrest and armrests. Gently tilt or slide the headrest to your desired position, ensuring it aligns with your neck and head for optimal support. For the armrests, adjust their height and angle to match your seating preference, providing adequate arm support. Tighten the knobs securely once adjustments are made. Test the stability of both components by applying gentle pressure. Proper alignment and adjustment enhance comfort and prevent strain during use. Refer to the manual for specific adjustment techniques if needed.
Final Assembly and Quality Check
Ensure all components are securely attached and properly aligned. Conduct a thorough inspection to verify stability and functionality. Make any necessary adjustments for optimal performance.
7.1 Attaching the Footrest and Final Tightening
Begin by aligning the footrest with its designated mounting brackets on the chair’s base. Secure it using the provided bolts, ensuring a snug fit. Next, perform a final tightening of all previously assembled components, such as the frame, seat, and armrests. Use an Allen wrench or screwdriver to ensure all connections are firm and stable. Double-check that no bolts are loose, as this could affect the chair’s stability. Once everything is securely tightened, test the footrest’s functionality by extending and retracting it to ensure smooth operation. This step ensures the recliner is safe and ready for use.
7.2 Ensuring All Parts Are Secure
After completing the assembly, inspect every connection to ensure all parts are tightly secured. Check the bolts on the base, frame, seat, and backrest for stability. Test the reclining mechanism by gently rocking the chair to confirm smooth movement. Inspect the armrests and footrest for proper alignment and security. Tighten any loose screws or bolts using the appropriate tools. Ensure the chair feels sturdy and balanced. Finally, review the assembly steps to confirm no components were overlooked. A secure assembly ensures safety and longevity of the recliner, providing a comfortable and reliable seating experience for years to come.

Testing the Recliner Chair
Test the recliner by gently reclining and returning it to an upright position. Ensure the footrest operates smoothly and the chair feels stable and balanced.
8.1 Initial Testing and Adjustment
After completing the assembly, perform an initial test to ensure all parts function correctly. Gently recline the chair and return it to its upright position to check the mechanism’s smoothness. Test the footrest by extending and retracting it several times. Ensure the chair feels stable and balanced. If any part feels loose, tighten the screws or bolts as needed. Adjust the headrest and armrests to your preferred position for comfort. Sit on the chair to verify its sturdiness and even weight distribution. Make any necessary adjustments to the reclining tension or alignment. This step ensures the chair operates safely and provides optimal comfort for the user.
8.2 Ensuring Smooth Operation
To ensure the Comhoma Recliner Chair operates smoothly, lubricate all moving parts, such as the reclining mechanism and footrest hinges, using a silicone-based spray. Regularly inspect the chair’s joints and tighten any loose bolts or screws. Test the reclining function by gently rocking back and forth to ensure it moves effortlessly. Check the footrest alignment to prevent uneven extension or retraction. If the chair feels stiff, apply a small amount of lubricant to the affected areas. Finally, test the chair under different loads to confirm stability and performance. Proper maintenance ensures the recliner functions seamlessly, providing years of comfort and reliability.
Maintenance and Upkeep
Regularly clean the chair with a soft cloth and mild detergent. Lubricate moving parts like hinges and mechanisms to ensure smooth operation. Inspect and tighten any loose screws or bolts periodically to maintain stability and prevent wear. Check for any signs of damage or fraying on upholstery or stitching. Addressing these issues promptly will extend the chair’s lifespan and keep it functioning optimally for years of comfort and relaxation.
9.1 Cleaning and Lubricating Moving Parts
Regular cleaning and lubrication are essential for maintaining the smooth operation of your Comhoma Recliner Chair. Use a soft, dry cloth to wipe down all surfaces, paying attention to areas around hinges and mechanisms. For tougher stains, dampen the cloth with mild detergent, but avoid harsh chemicals that could damage the materials. Moving parts, such as the reclining mechanism and footrest hinges, should be lubricated with silicone-based spray or oil to prevent friction and wear. Apply lubricant sparingly to avoid attracting dust. Clean and lubricate every 2-3 months or as needed, depending on usage. This maintenance ensures the chair remains functional and comfortable for years to come.
9.2 Regular Inspection and Maintenance
Regular inspection and maintenance are crucial to ensure the longevity and optimal performance of your Comhoma Recliner Chair. Start by examining all bolts, screws, and hinges for signs of wear or loosening. Tighten any loose components immediately to prevent instability. Inspect the upholstery for tears or damage and address them promptly to avoid further deterioration. Check the reclining mechanism and footrest for smooth operation, ensuring no obstructions or blockages. Replace any worn-out parts, such as cushions or armrest pads, to maintain comfort. Schedule inspections every 3-6 months, depending on usage. Proper maintenance not only enhances durability but also ensures the chair remains safe and comfortable for years of enjoyment.

Troubleshooting Common Issues
Identify and resolve common issues with your Comhoma Recliner Chair, such as loose parts or malfunctioning mechanisms, by checking for obstructions and ensuring proper assembly.
10.1 Identifying and Fixing Assembly Errors
During the assembly of your Comhoma Recliner Chair, errors may occur, such as loose parts or misaligned components. Start by reviewing the instructions to ensure all steps were followed correctly. Check for any missing or extra hardware, as this can lead to improper fitting. If a part feels unstable, verify that all bolts and screws are tightened securely. For misaligned pieces, gently adjust them before tightening. If issues persist, consult the troubleshooting section or contact customer support for assistance. Patience and attention to detail are key to resolving assembly errors effectively.
10.2 Addressing Operational Problems
After assembly, operational issues such as a stuck reclining mechanism or uneven movement may arise. Start by inspecting the moving parts for proper lubrication and alignment. If the chair feels unstable, check for loose bolts or screws and tighten them firmly. For issues with the reclining function, ensure the mechanism is correctly installed and free from obstructions. If problems persist, refer to the troubleshooting guide or contact customer support for professional assistance. Regular maintenance, such as lubricating hinges and tightening hardware, can prevent operational issues. Addressing these problems promptly ensures optimal performance and longevity of your Comhoma Recliner Chair.

Tips for Optimal Use
Adjust the chair to fit your body for maximum comfort. Use the reclining and massage features wisely. Regular maintenance ensures longevity and optimal performance of your Comhoma Recliner.
11.1 Adjusting the Chair for Comfort
Personalize your Comhoma Recliner Chair for ultimate comfort by adjusting key features. Lower or raise the seat height to fit your body perfectly. Tilt the armrests up or down to support your arms naturally. The headrest can be adjusted to cradle your neck and ensure proper spinal alignment. For added support, fine-tune the lumbar adjustment to match your lower back curve. Experiment with the reclining mechanism to find your ideal position, whether upright for reading or fully reclined for relaxation. Don’t forget to extend the footrest for leg support, ensuring even weight distribution. These adjustments ensure a tailored fit, maximizing comfort and relaxation for every user.
11.2 Using Custom Features Effectively
Maximize your comfort with the Comhoma Recliner Chair’s custom features. Utilize the massage settings to target specific areas like the back, shoulders, or legs for a soothing experience. Adjust the heat function to warm up on chilly days or relax tense muscles. Explore the reclining mechanism’s multiple positions to find your perfect spot for reading, napping, or watching TV. Don’t overlook the built-in cup holders and storage compartments for convenience. For tech enthusiasts, connect your devices via USB ports or Bluetooth to enjoy music while relaxing. Experiment with these features to create a personalized experience tailored to your needs and preferences, ensuring every use is enjoyable and rejuvenating.

Warranty and Customer Support
Comhoma offers a comprehensive warranty covering parts and labor. Dedicated customer support is available via phone, email, or live chat to address any inquiries or concerns promptly.
12.1 Understanding the Warranty Coverage
Comhoma recliner chairs come with a comprehensive warranty program designed to protect your investment. The warranty typically covers manufacturing defects in materials and workmanship for a specified period, often up to 5 years. This includes coverage for the frame, reclining mechanism, and electrical components. However, it may not apply to damage caused by misuse, normal wear and tear, or improper assembly. To activate the warranty, users must register their product within the specified timeframe, usually within 30 days of purchase. Detailed terms and conditions can be found in the product manual or on the official Comhoma website. Understanding the warranty ensures peace of mind and protection for your recliner chair.
12.2 Contacting Customer Support
Comhoma provides dedicated customer support to assist with any questions or issues related to your recliner chair assembly. You can reach their support team via phone, email, or live chat through their official website. Operating hours are typically Monday to Friday, 9 AM to 6 PM EST. For convenience, the website also offers a detailed FAQ section and a contact form for inquiries. When contacting support, have your product serial number and purchase details ready to expedite assistance. The support team is trained to address assembly challenges, warranty claims, and operational concerns, ensuring a smooth experience for all Comhoma recliner chair users.

Conclusion
Thank you for following this guide. With careful assembly and proper care, your Comhoma Recliner Chair will provide years of comfort and relaxation. Enjoy your new chair!
13.1 Final Thoughts on Assembly
Congratulations! You’ve successfully assembled your Comhoma Recliner Chair. This process required patience and attention to detail, but the end result is well worth the effort. By following the instructions carefully, you’ve ensured that your chair is both functional and safe to use. Remember, proper assembly is key to enjoying the full benefits of your recliner. Take pride in your handiwork and enjoy the comfort it provides. If you encountered any challenges, don’t hesitate to refer back to the guide for clarification. Happy relaxing!
13.2 Enjoying Your New Recliner Chair
Congratulations on completing the assembly of your Comhoma Recliner Chair! Now it’s time to unwind and enjoy the fruits of your labor. Adjust the chair to your preferred position, whether it’s reclining back or elevating the footrest. Explore the customizable features, such as the reclining mechanism, to find your perfect comfort setting. Consider adding a cozy throw blanket or a side table to enhance your relaxation experience. Remember to follow the maintenance tips provided earlier to keep your chair in excellent condition. Take a moment to appreciate the comfort and style you’ve brought into your home. Happy relaxing!